One of the things we looked forward to the most about the farm was having space for a big garden. To be fair – the garden for the most part has been Larua’s domain. The farm had an existing garden space which Laura has spent a great deal of effort turning into a very successful garden. I’ve been amazed at the produce we get each year and I look forward each year to hearing her plans for what shes going to plant that year as she combs through the seed catalog.
The first (or may be 2nd?) year we had the farm I recall Laura telling me she had found someone locally who was selling seed garlic. Initially the idea of planting our own garlic didn’t strike me as something I’d love doing but I was happy Laura was experimenting. I helped Laura that first fall plant the garlic cloves, cover it with straw, and then I sort of forgot about them. Fast forward to the following spring and the garlic started to pop up through the straw. Laura had purchased a few different varieties but there were two main categories of garlic – hard neck and soft neck. The hard neck grows what’s called a “scape” which you trim off to promote the bulb to grow bigger. On the plus side – the scape has a very pleasant garlic flavor which we’ve had success in using to make both garlic powder as well as fresh garlic scape pesto.
Then came the actual garlic harvest which was incredible. I’m not sure what I was expecting but harvesting the garlic was super easy and I was amazed at how much garlic we got. The first year we dried the garlic by laying it out and using a fan to move air across them. It worked great and soon they had dried enough that we could store them for use throughout the rest of the year. I was hooked! We started talking about growing more garlic the following year with the idea that we’d keep increasing how much we save to plant the coming year so we’d keep increasing the yield.
Last year we planted about twice as much as we had the following year and I was looking forward to having mountains of garlic. Spring came, we enjoyed the scapes again, and then later in the summer we harvested the garlic. It looked great!
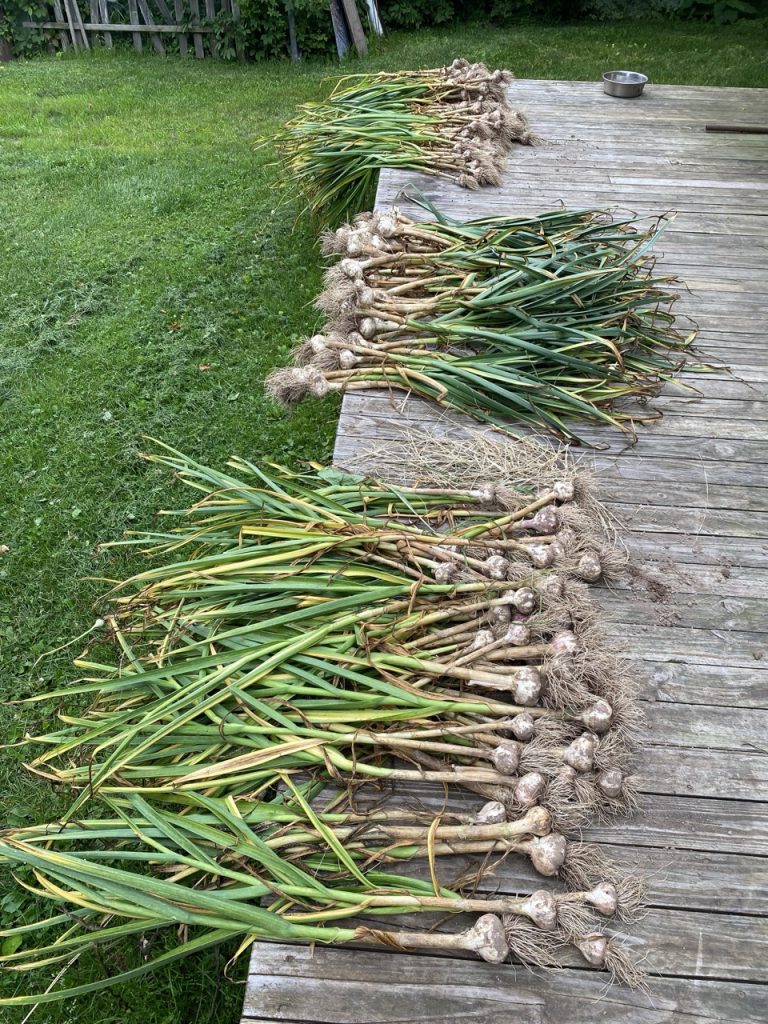
This time though we decided to try hanging the garlic in bunches to let them dry. We hung the bunches on sections of a wooden fence to dry and thought we were in good shape. Unfortunately this was the beginning of our problems.
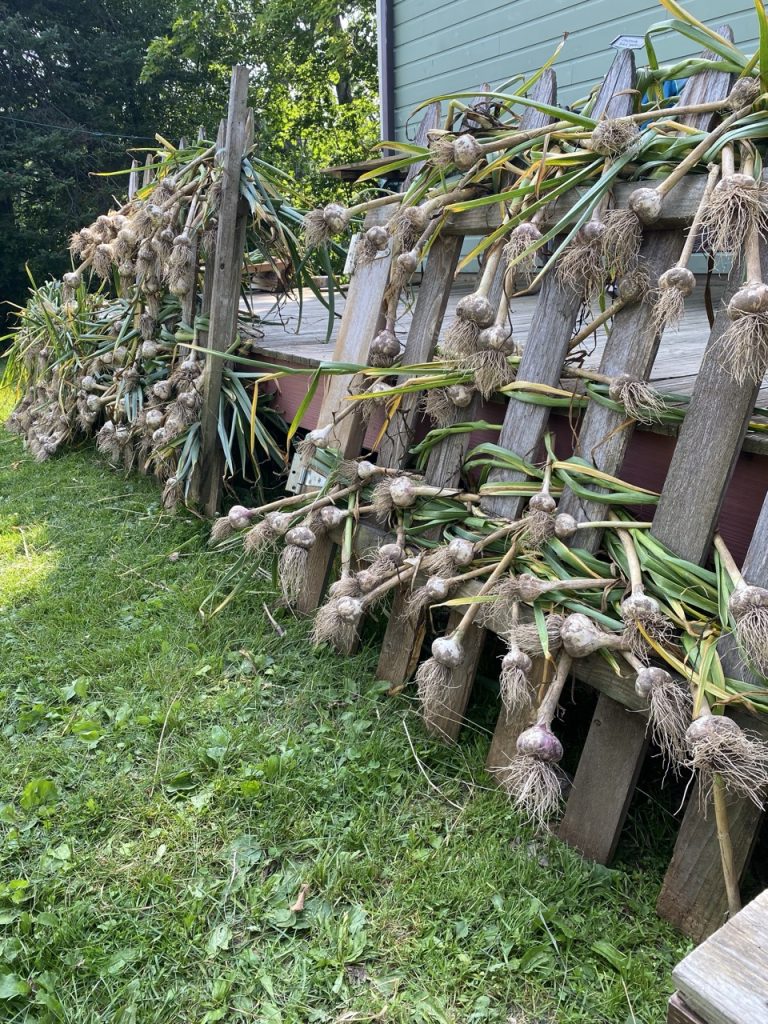
While the drying started OK we eventually had to leave the farm and we had some concerns about leaving the garlic outside to dry. We thought there might be rain and I was worried that some animal might come and start nibbling at the garlic. We decided to put the bunches inside the kitchen to keep them safe and headed home for the week. Unfortunately when we returned the garlic had started to show signs of mold. We should have known better honestly. There was no moving air in the house, the garlic was still pretty fresh and had a good deal of moisture in its outer leaves, and the house can get quite hot during the summer. Laura spent a lot of time trying to peel the outer layers off each bulb to remove anything that looked like it had started to mold while being careful to not remove too much of the bulb covering. Despite these efforts, and despite moving the bulbs and ensuring they had good airflow, the mold seemed to return. Laura was pretty sure that the garlic was garbage now and we were both pretty disappointed. This is where I came in…
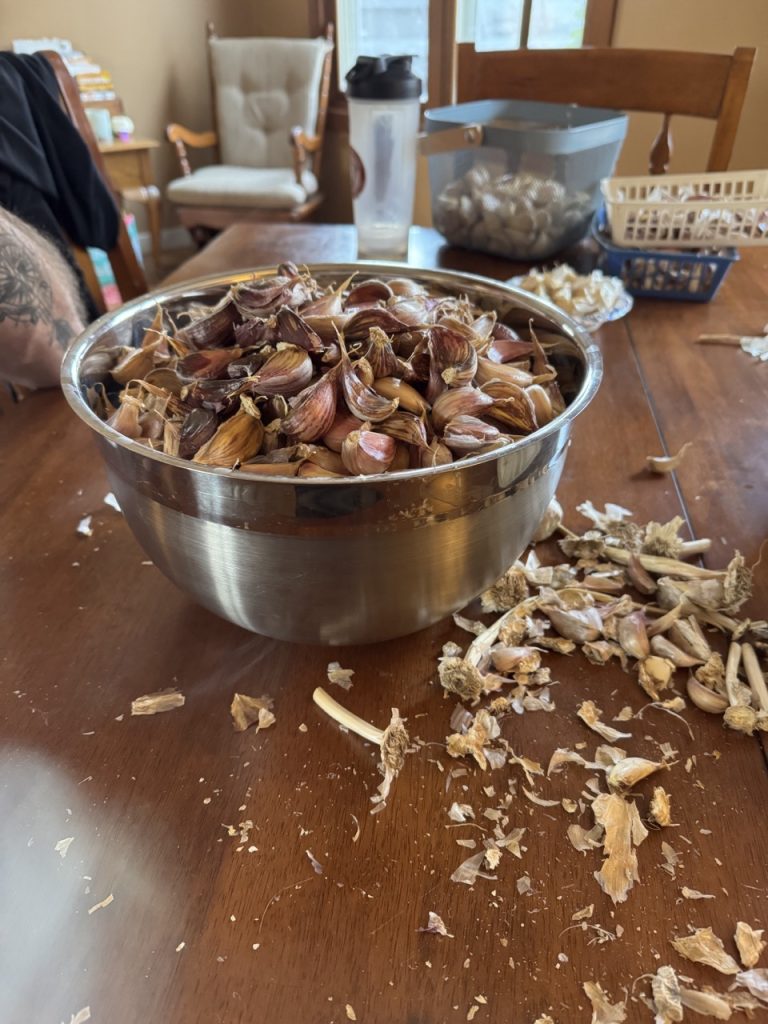
Not wanting to waste the garlic I thought I’d try stripping each bulb down as close to the individual cloves as I could. This was a time consuming process as there were quite a few bulbs but after a couple of hours I had the better part of a milk crate full of bulbs of garlic. I tried to keep the bulbs in tact and all of the cloves secured to the bottom of the bulb but I did rip the stem out of the top of the bulb to try and remove as much of the plant as I could. I then placed the milk crate of bulbs in our basement in a dark corner elevated on a shelf and set a timer to have a box fan blow on the crate a few hours each day. I checked on them regularly making sure there was good airflow and that there were no more signs of mold on any of the bulbs. After a few weeks I became convinced I had got rid of all of the mold but I was still worried that I had perhaps gone too far in remove the outer layers of the bulb. From what we read removing too much of the bulbs out layers can cause the garlic to go bad. However I then found another article that said the important things was just to keep all of the cloves attached to the bottom of the bulb to prevent them from drying out and shriveling.
Fast forward to the end of October and the bulbs all still looked great! At this point I had about 150 bulbs of random garlic. One of the bummers about the garlic I saved was when Laura thought it was garbage she mixed all of the varieties together in a bin since we thought we were going to compost them. This is where I started calling it “Jumble Garlic”. The bulbs were a mix of hard and soft neck varieties and either “Chesnock Red”, “Armenian”, “Deer Field Purple”, “Inchellium”. Some will be obvious as they have a specific appearance be to be honest Im not sure I care. It all tasted good :)
Then came the planting! The first step was to break all of the cloves from the bulb. This is when I truly realized how much garlic I had saved…
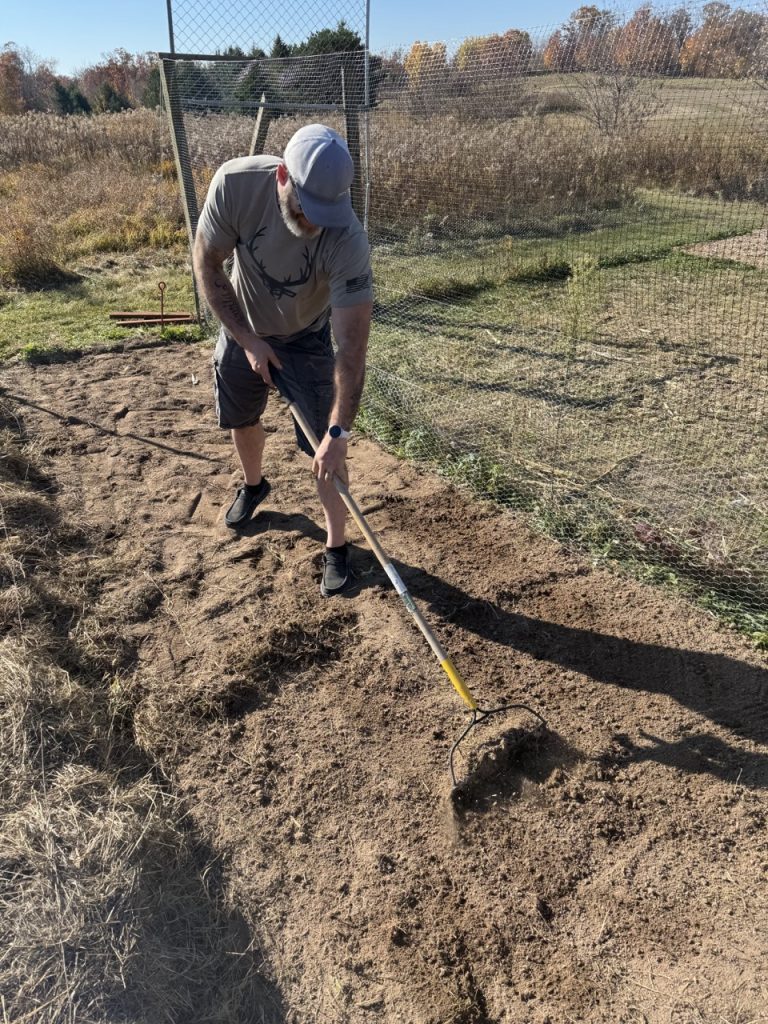
When we planted them in previous years we used a stick (or a finger) to make holes about 4 inches apart and placed a clove in each hole. The process was time consuming and lots of the cloves got planted closer than 4 inches together. After some research I found someone online who mentioned making what I thought they said was a “dibble board”. To be honest Im not sure if that’s the right term for this but I refuse to look again and prefer to stick with calling it a “dibble board”. I spent a couple hours in the workshop and came up with this thing…
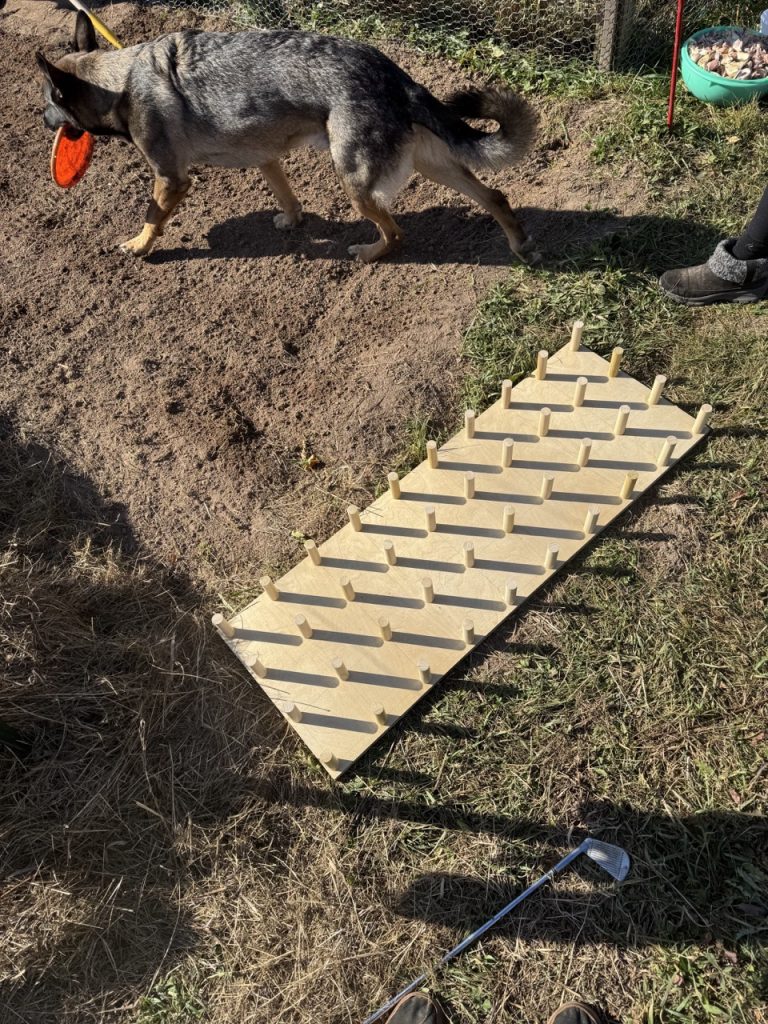
To be fair – I spent longer than I had planned trying to find a way to sharpen each of the dowels on the board. I finally settled on the fact that if it was freshly tilled dirt they perhaps didnt need to be pointed. I had a few weeks earlier identified a strip of ground next to the tree nursery that I planned on using for planting the garlic and covered it with a tarp to kill the weeds. Just tilling the ground ended poorly for me in the tree nursery earlier that year so (see my post on the tree nursery wrap up) my new go to method for prepping the ground is to tarp it for a few weeks or months and let the weeds all die. This was my first time doing this and it worked beautifully! A couple of passes with the tiller and we had great looking soil to work in.
We then simply laid down the old dibble board and stepped on it and presto!
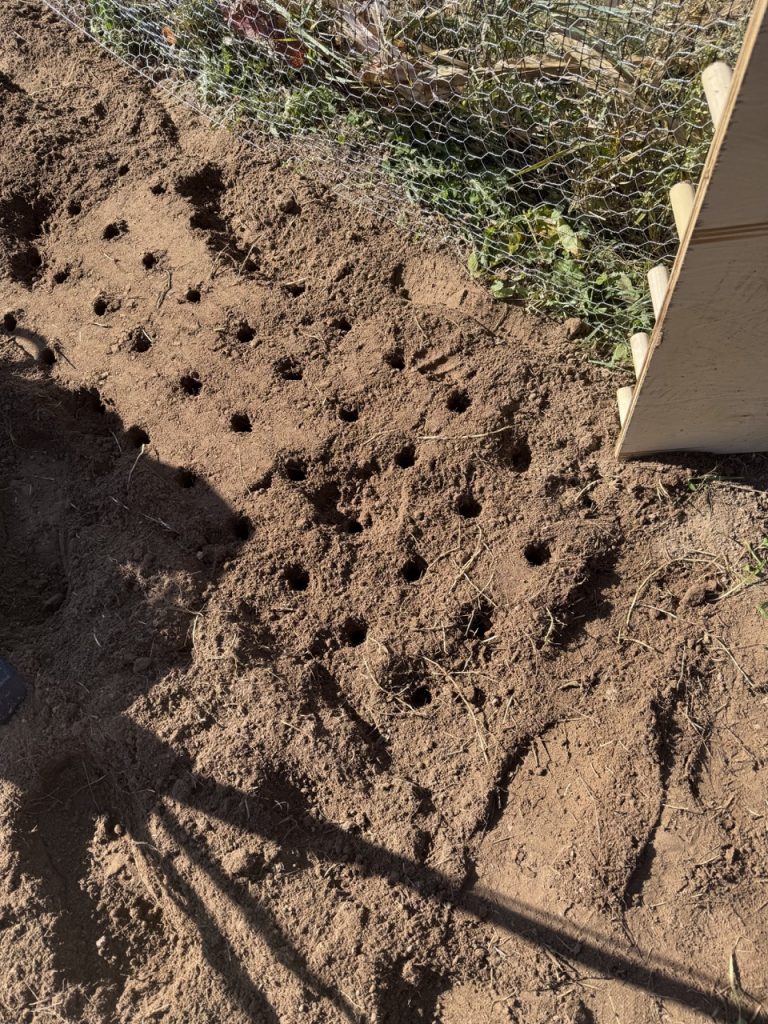
Freshly dibbled holes ready for planting! Ben and Joanna helped me put a clove in each hole…
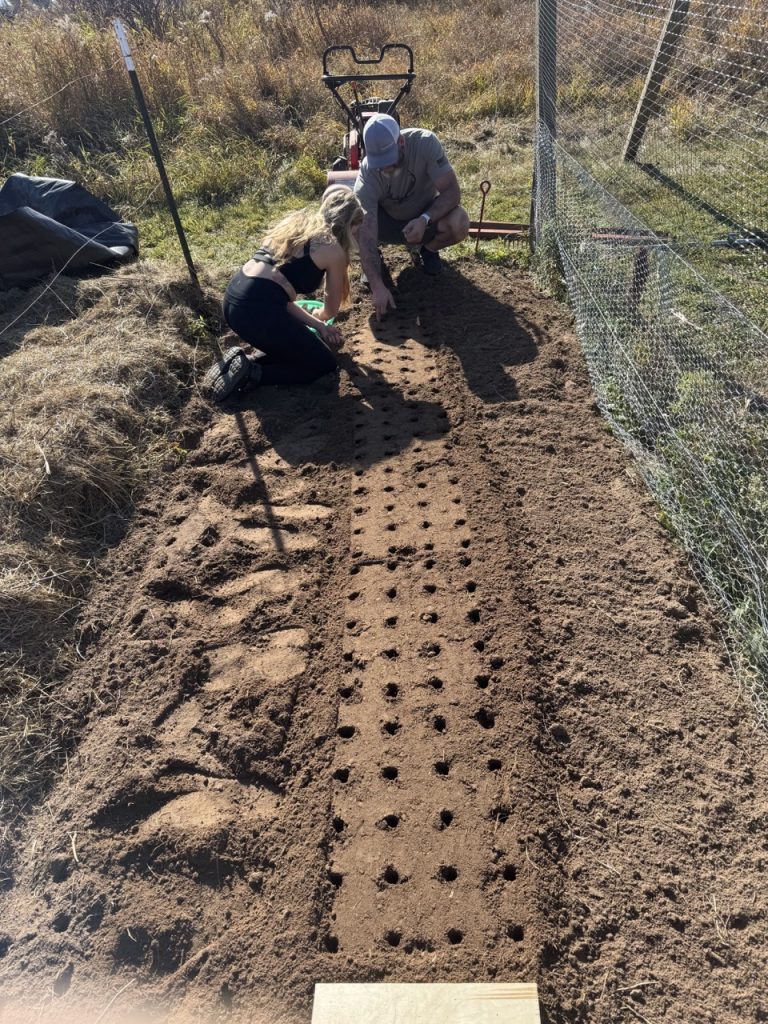
The dibble board worked really well! My only mis-step with this initial planting is that the row I wanted to use was sandwiched between the rasbperry bushes and the tree nursery and it was hard to dibble the ground and plant it without stepping on un-dibbled ground which would compact it and make dibbling hard (also dibble and more dibble).
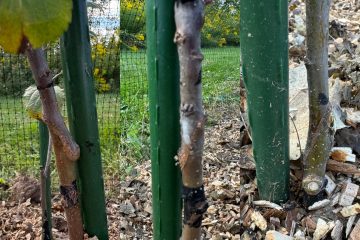
After we had the cloves in the ground we brushed the dirt back over the holes and then we covered the planted ground with straw. This was also out first year planting the garlic outside of the fenced garden so we’re hoping that garlic isnt appetizing to anything that might want to dig up the cloves this fall/winter or the bulbs in the spring.
In any case – Im glad I put the effort into saving the bulbs and Im looking forward to seeing if my jumble garlic pans out next year :)
Big thanks to Ben and Joanna for their help in planting!
0 Comments