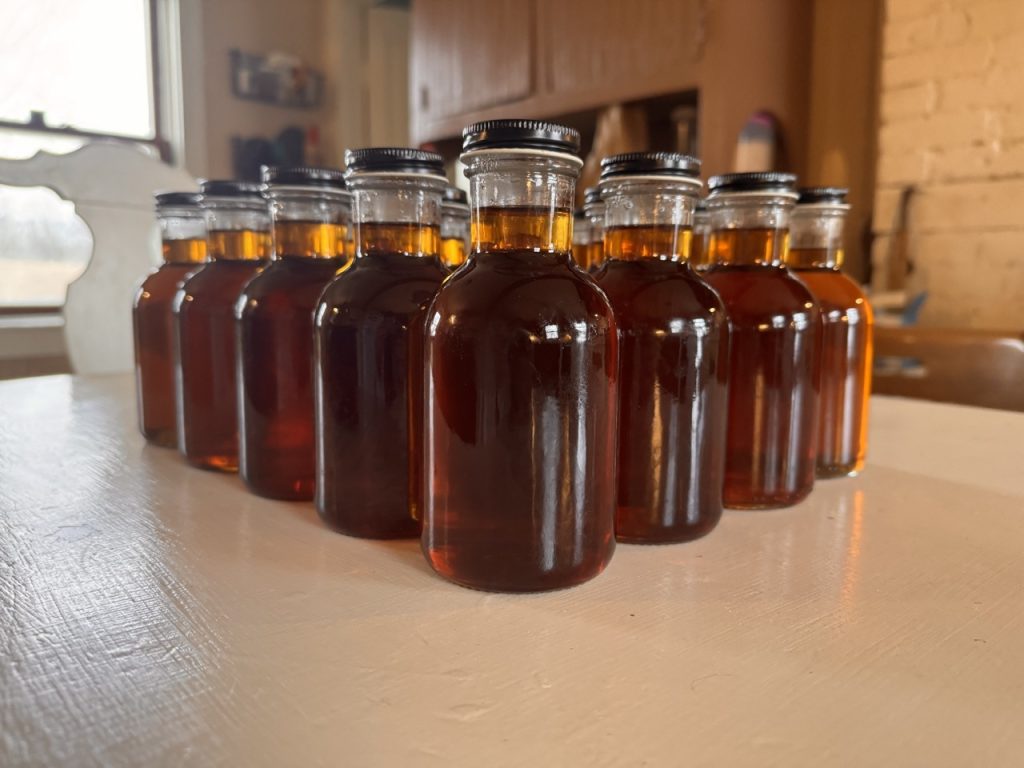
Maple syrup season had a slow start for us this year. Last year the weather was right where we tapped the trees at the end of February and we did our first boil on March 3rd. This year we tapped on March 2nd but only because the forecast made it look like we’d start being in the freeze/thaw cycle the upcoming weeks. We’ve had some sap run – but nothing super substantial to this point. Of the 40 trees we tapped we have so far collected 70 gallons of sap in 2+ weeks. Seems like a lot but when you consider that the sap to syrup ratio is 40:1 it means that we’ve only been able to make somewhere around 1.75 gallons of syrup. In any case – we spent the weekend boiling and bottling and ended up with 20 finished bottles of maple syrup!
The process for this year was much like last year. We first have to go out and collect sap from all of the buckets. This time around my sister Mary from Madison came up to visit and she was a huge help with not only collecting the sap but also in processing it.
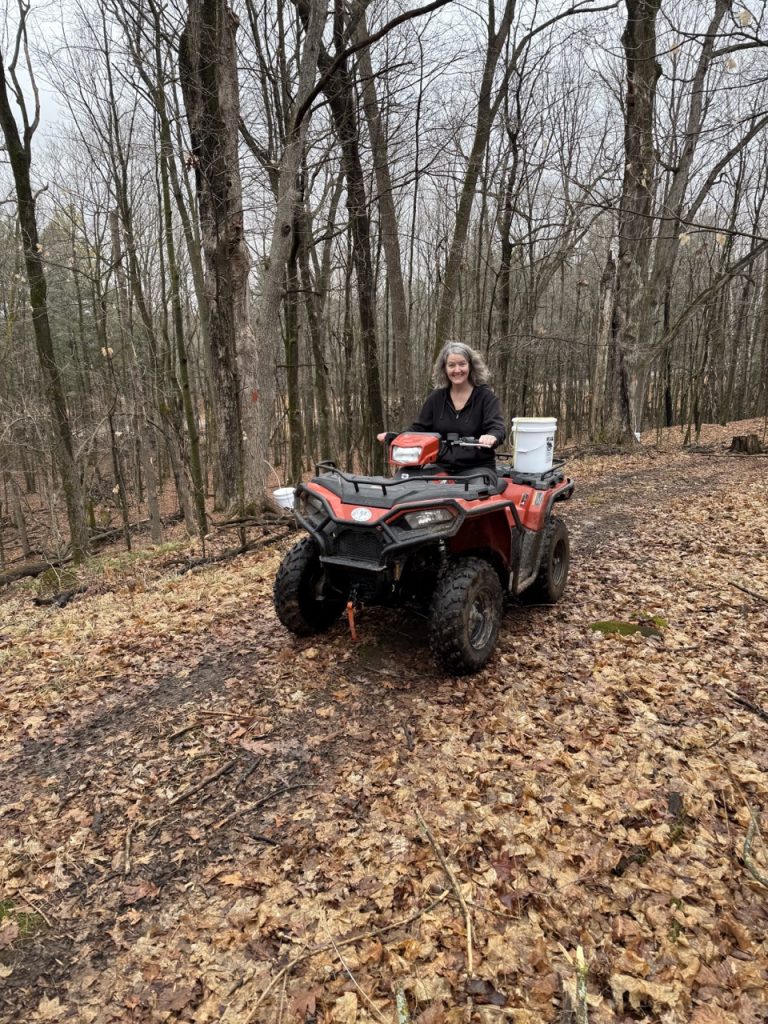
The 4-wheeler was a huge help here as the trail through the woods is almost a mile long. We take some empty buckets strapped to the back and just go from tree to tree collecting the sap. Once we have enough to fill the evaporator we fire it up and then continue collecting sap from the remaining trees.
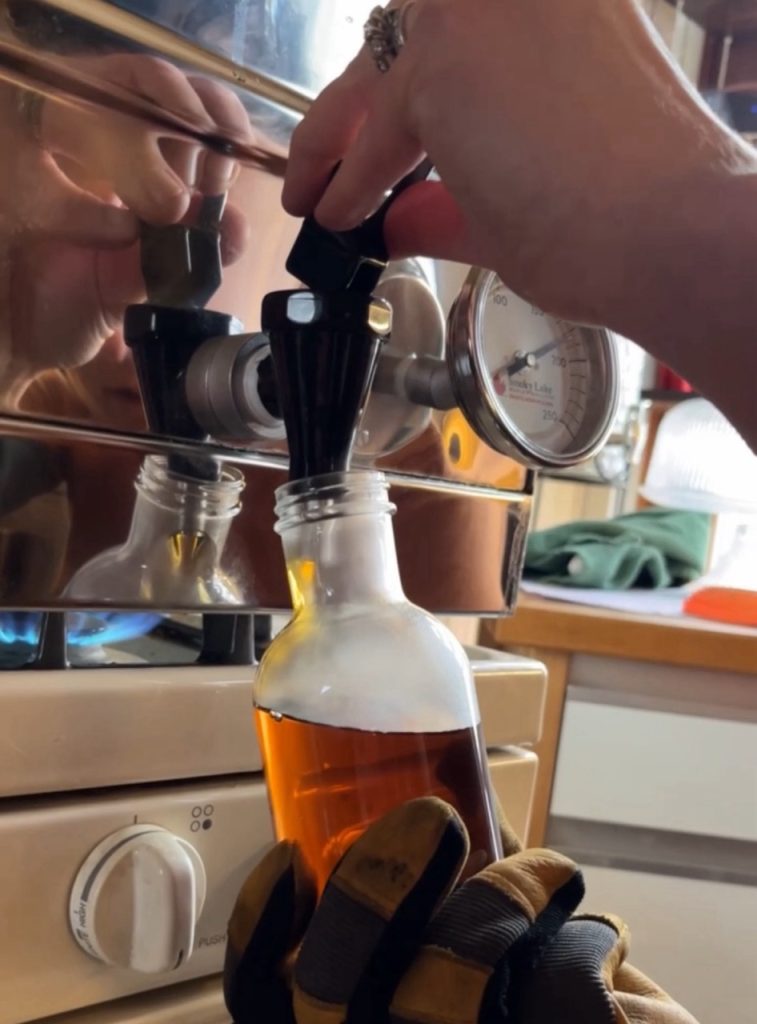
The other changes this year for us come in terms of testing the syrup and bottling the finished syrup. We bought what’s referred to as a “Murphy Compensation cup” from Smoky Lake. In previous years we had attempted to use a refractometer to gauge the syrup density. While this should work we had issue with the syrup becoming too dense which lead to crystals forming in the bottom of the bottle after it sits for a period of time. There’s no harm in the crystals forming but not everyone knows that and it was something we wanted to avoid for syrup being sold to folks. The more common way to test sugar density is to use a hydrometer which you float in the syrup to gauge it’s density. The problem with this approach is that the testing relies on a temperature offset based on the sample temperature. The Murphy cup takes the guessing out of this by referencing the temperature of the sample to a finished density…
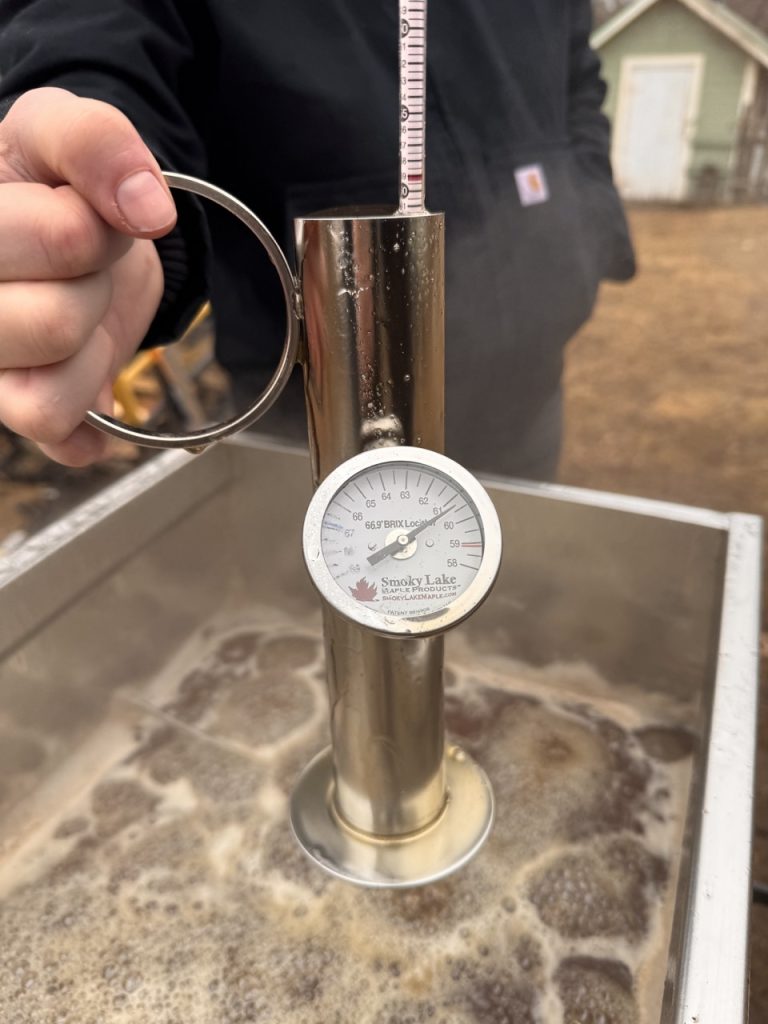
Its hard to see in the above picture but the hydrometer here is reading over 61 while the gauge is reading just under 61. In this case it means that syrup is past the preferred density (something we were actually aiming to do here). The ideal BRIX of the syrup is 66.9 and if the number on the gauge aligns with the number on the hydrometer you’ve hit that number dead on! So why did we want the syrup more dense that what is desired? Because it’s easier to add back some sap to lower the density than to keep boiling the syrup to reach a higher density. This is where steam bottling comes in.
The steam bottler is basically a double boiler for finished syrup that also handles the filtering piece of syrup processing. Since we use a flat pan we pull the pan off the evaporator with the syrup just slightly denser than we want it. Then we took the pan inside (it had gotten awfully cold outside) and filtered the syrup by simply draining the evaporator pan into the top of the steam bottler which houses a filter set…
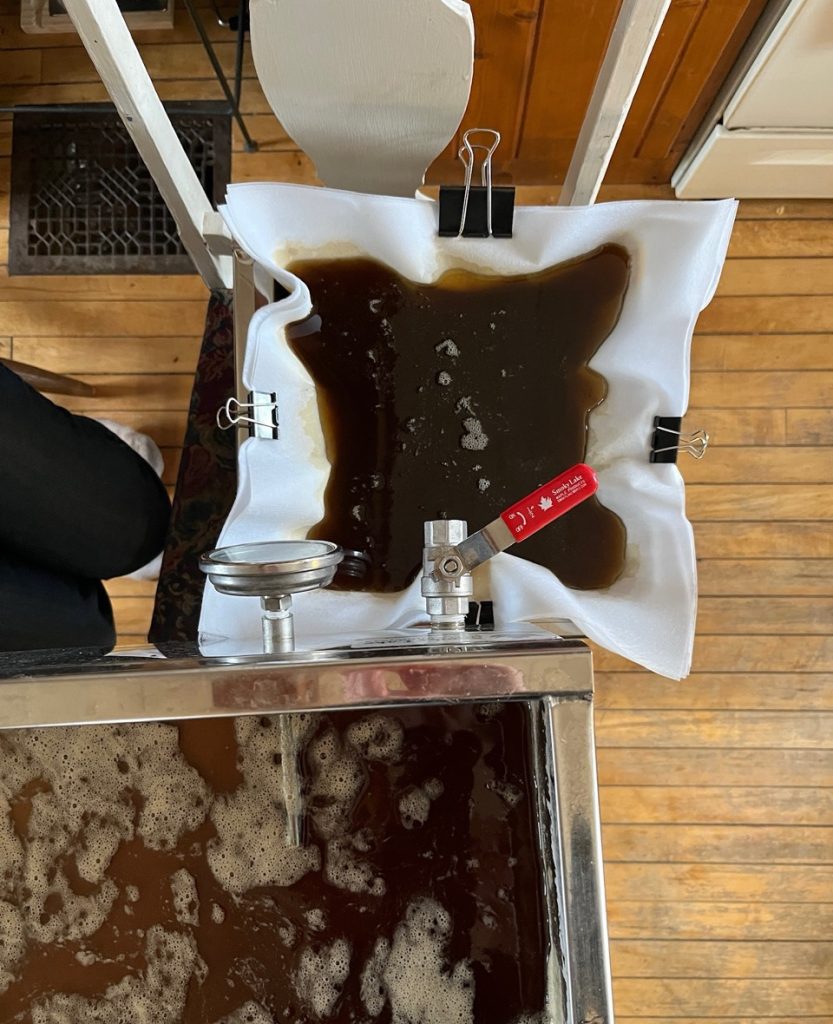
The steam bottler comes in two different formats. You can get one that is heated with an electrical element or one that uses a gas burner (or get one without a heat source). For us we opted for the gas version initially and then realized that the burner it came with was the same as any outdoor propane burner (which we already had) so we returned the burner component. That said – the gas version can be used on a gas cook top as well so once filtered we simply set the unit on the gas cook top and let the steam heat the syrup up to temperature. Once to temp we tested the density of the syrup again and then added enough fresh sap to the syrup to lower the density to the perfect value…
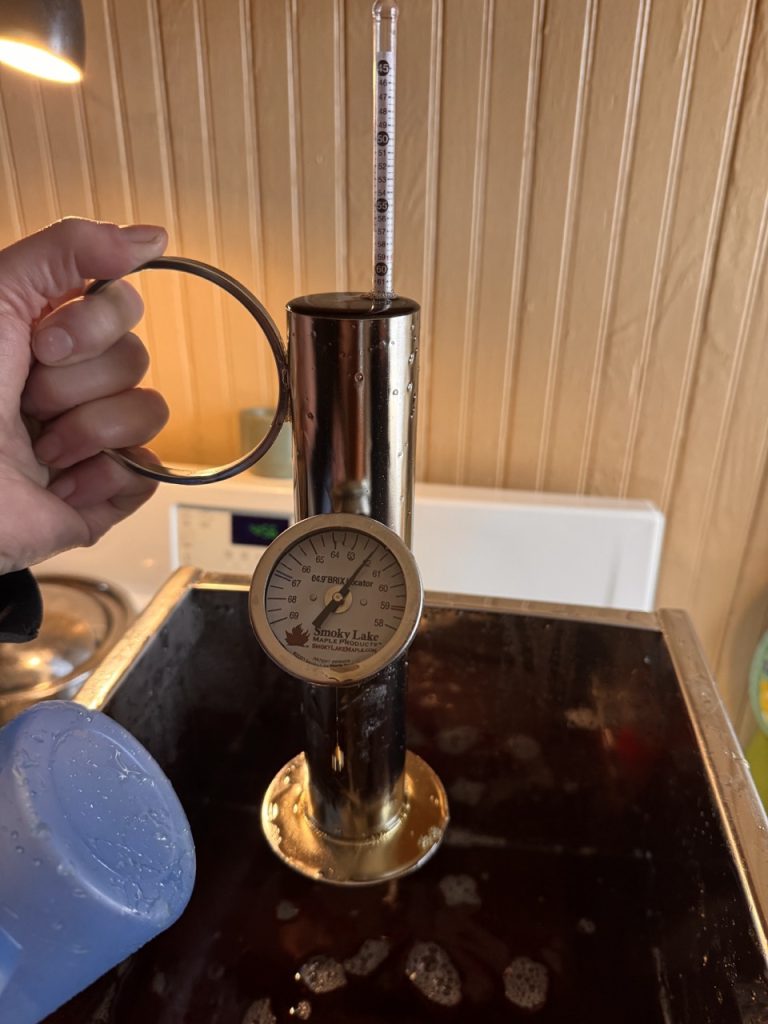
You can see above that both the gauge and the hydrometer are reading 62. A match means we’ve hit the perfect density! Once we got the density squared away you simply fill the bottles out of the valve at the bottom of the steam bottler…
The syrup should be between 180 and 190 degrees when bottling and the steam bottler has a temperature gauge to tell you when you’ve reach this temp. From that point you simple dispense the hot syrup in the bottle, cap it, and wait for it to cool. As we had about 1.75 gallons of finished syrup we were able to fill up to 20 10oz bottles with a little leftover…
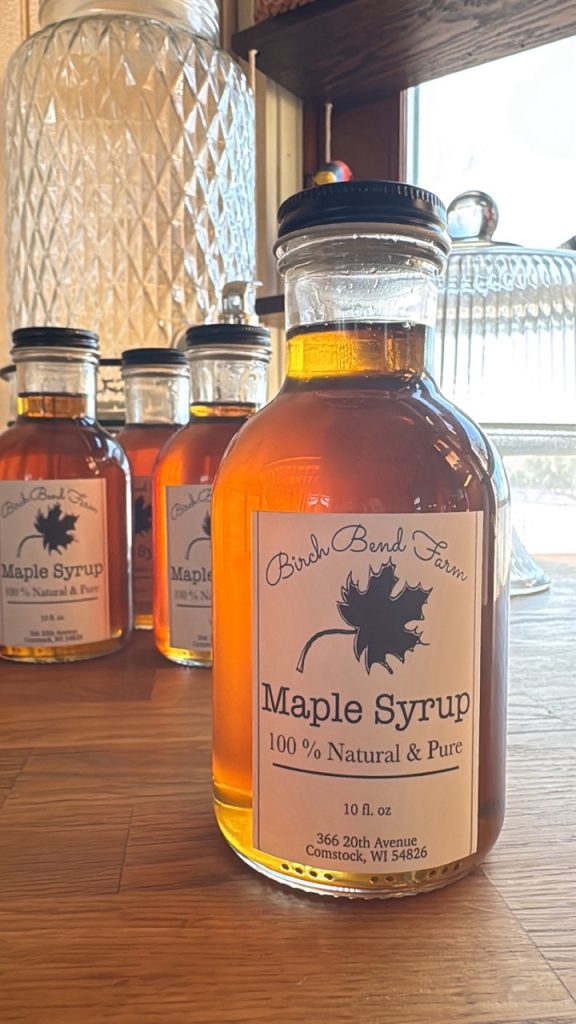
Once cooled – we put on the labels we had ordered and I just love the way these turned out!
Looking forward to the rest of maple syrup season to see what sort of overall yield we get. I can safetly stay at this point that the feed tank, Murphy compensation cup, and steam bottler we bought from Smoky Lake were welcome improvements to our process. Stay tuned and if you’re interested in buying a bottle reach out and let us know!
0 Comments