As I talked about in my last post we purchased a lumber mill for the farm and I talked about the delivery and building the head. I was able to accomplish that in a weekend of on and off work – it took me about 5 hours total to get the head assembled. The next step, actually the first step if you are following the manual, is to get the tracks setup. While this step seems rather trivial compared to the head construction I found it a rather difficult task because of a few things…
- It had gotten much colder outside. Temperatures hovered around 15-20 and a lot of the work of assembling the rails required installing nuts and bolts that weren’t easy to do with gloves on. I would read up on what step I was working on, go out to work on it for 15-20 minutes, and then come back in to warm up.
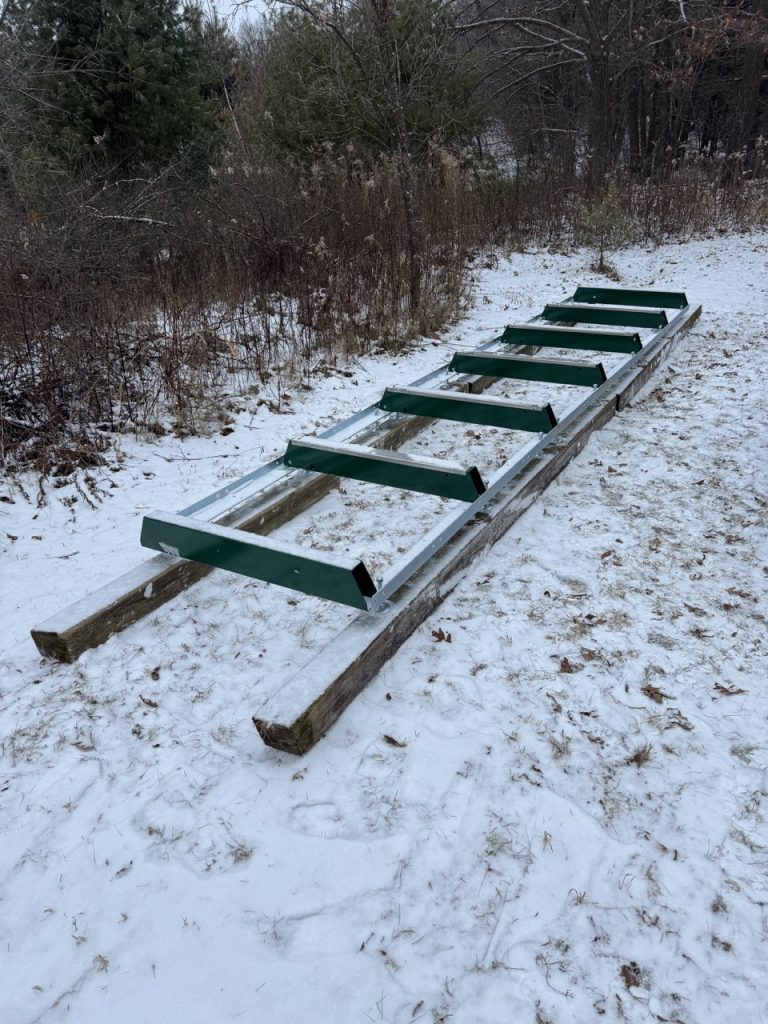
- While the rails themselves have leveling feet those are really designed for fine adjustments of the rail. For a ground based install like mine you really need something that’s relatively level already to install on top of. I plan on building a milling shed next year but for now I chose to install the rails just on top of existing 8×8 beams I had laying around. The spot I chose was relatively flat already (or so I thought) so I thought I could pretty quickly get the rails level simply by using the feet adjustments. This turned out to the be the most finicky part of the setup. More on this later…
- The instructions suggest you build the rails by setting them on perpendicular boards off the ground and then move them to their final destination. I didn’t have enough beams to do this so I chose to just do the assembly on the beams in their final destination. This turned out to be sort of a pain but Im also not sure how you would realistically assemble the tracks and then lift them and move huge beams under them.
In any case – I started out by laying out the beams in a relatively flat area…
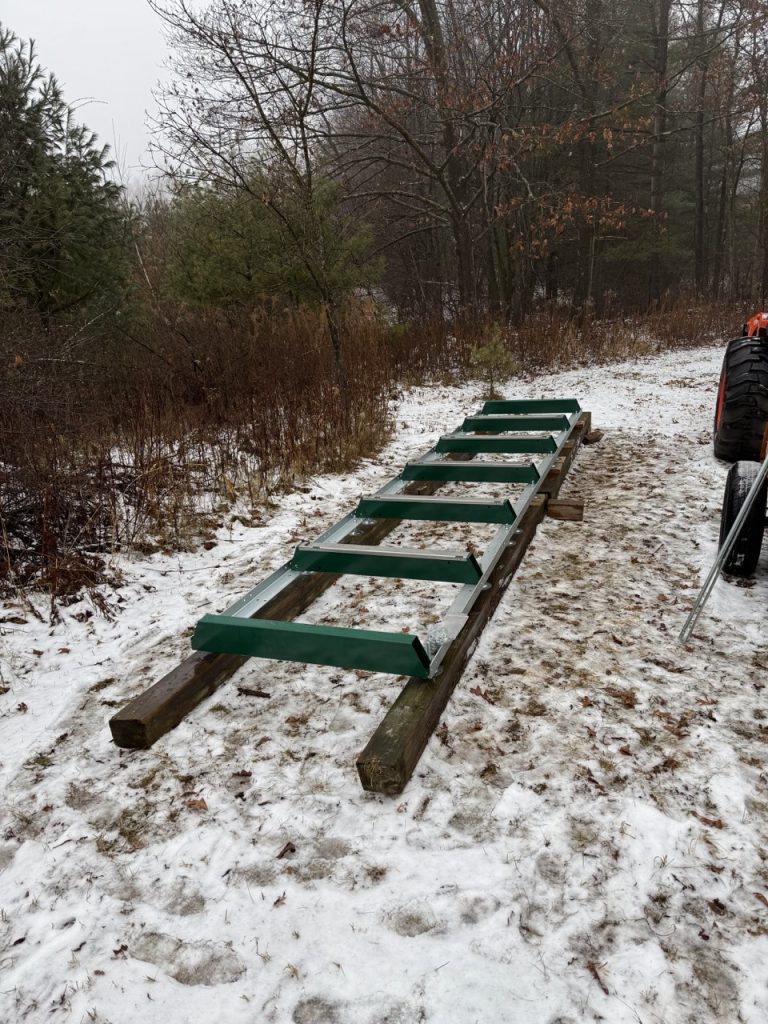
The tracks are basically sections of rail with bunks (that the logs will sit on) installed perpendicular to the rails so the construction is quite simple. That said there were one or two times I made assumptions about which size bolt to use in certain places that later proved to be wrong. Namely – I assumed that longer bolts were meant to be used to go through only areas where they made sense (to me) or places that required a longer bolt to make the connection. This turned out to be wrong so there were a few times I had to go back and replace bolts with the proper size. A more detailed reading of the manual in these cases would have saved me some time.
Once I got the track loosely together I started leveling it out. The manual suggests you start from the center and work your way out. This is where I spent a lot of time. I found that my beams on the ground that I thought were levelish really weren’t. I tried to use the leveling legs to get the tracks level but wasted a lot of time adjusting them across the entire length of the track until I finally realized I needed more height under the legs on one end of the track. I cut scrap pieces of 2x8s and stacked them up where needed to get things level. You can see that a little in the picture below on the far side of the track. Once I did this – using the leveling feet to get the entire track level was straightforward but still time consuming…
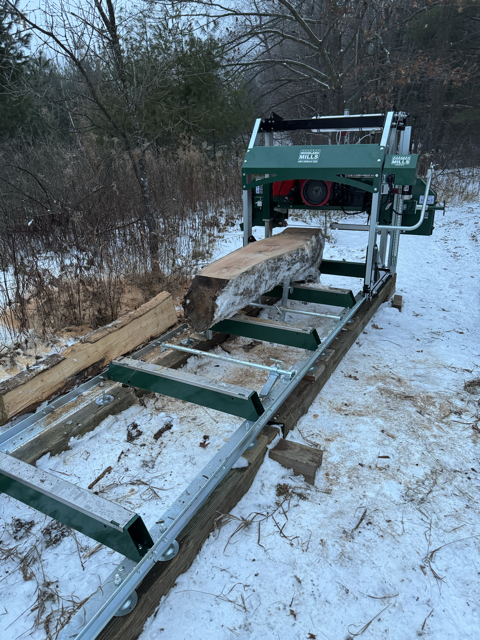
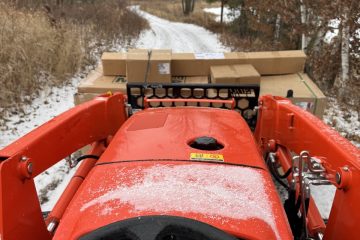
Once the track was done the next thing to do was to lift the head onto the track. Enter the tractor to save the day once again…
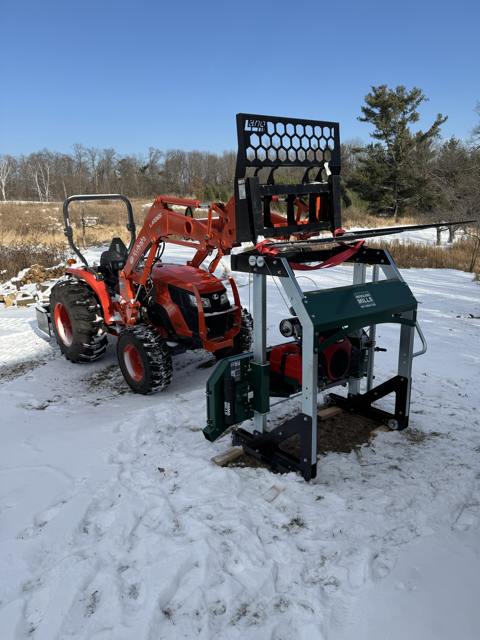
Even with the tractor though this is most certainly a two person job. I was on the tractor and had to have a helper help guide the wheels onto the track as I eased the head down…
Once I got the head on the track I realized that I hadn’t fully thought through the track placement and in fact had the head on backwards. I had considered the placement of the log stops when I assembled the track so that I could load the logs from the side that was more open. However I did not take into consideration the direction that the blade moves. As with any saw you want the blade to move in the direction of your saw stop which in this case are the adjustable log stops attached to the bunks. The position of the these stops is dictated by which way you install the bunks as the bracket that hold the stop is only on one side. In my case the stops would be on the left side of the tracks in the above picture. If I had left the head in this direction the blade would have been pushing the logs to the right away from the stops. This was an easy enough fix – I just picked up the head and spun it around again so the head would cut in the other direction.
There are of course other pieces that needed to be installed such as the anti-tip rail and the corresponding anti-tip brackets on the head. Then I also had to add the log stops and the log clamps and rails. I also had to adjust the blade guides which was a little finicky but didn’t take too long to do once I figured out the process. The adjustable blade guide that allows you to close or open the throat of the saw needed to be adjusted to be parallel with the blade as well. I wish I had more pictures of some of this but I’ll admit I was freezing and taking my cell phone out to take pictures meant taking my gloves off so there werent a lot of pictures being taken during the install.
In any case – once I got this done I also installed the power lift head which was surprisingly easy to do despite the instructions. They send you an entire set of metal shims but dont really give much guidance about how to use them. After watching a few YouTube videos of other folks installing the lift I managed to figure it out. In summary – just install enough shims to get the shafts lined up correctly. Once that was installed I added the battery, engine oil, and filled up the gas tank. Much to my surprise the engine fired right up (I was surprised because it was terribly cold and the priming bulb from the gas tank barely moved). One of the things they mention briefly is to not run any lubricant on the blade for the first 30 minutes of milling so I didn’t even bother adding any yet but I do have window washer fluid on hand (as recommended) for when Im ready for that.
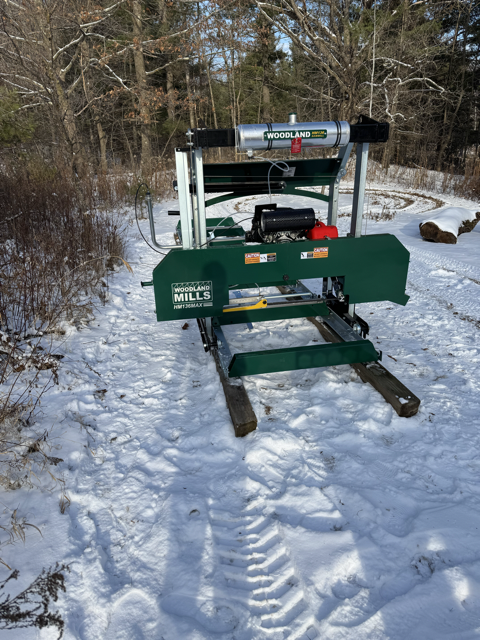
That all done I finally got to mill a log!
The first log I tried to mill was pine and had way too many small branches on it so I decided to jump right into a big red oak log. I can only say I was immediately impressed. The mill works great – it effortlessly cut through the log…
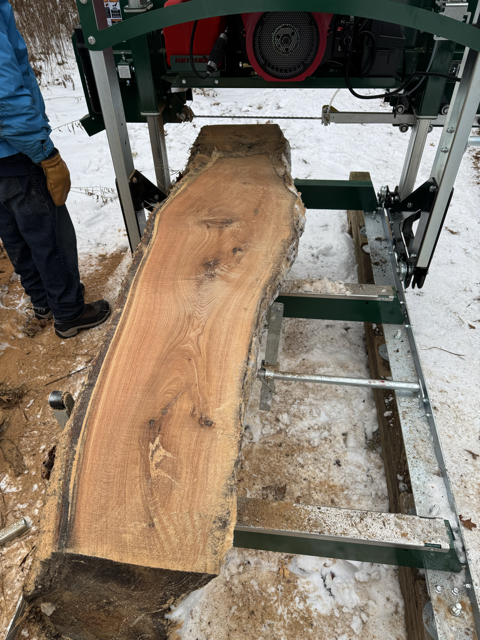
I ended up milling this log into 2 inch slabs and wow was it gorgeous wood…
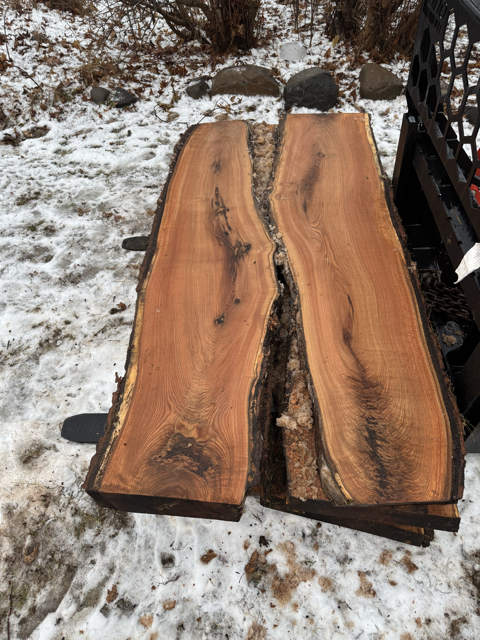
I was hooked! I later tried milling some of the fallen white pine logs I had collected from the woods and found it incredibly easy to turn them into totally usable large dimension cants…
I still have a lot to learn but my immediate impression is that this is a well made saw mill that will pay for itself very quickly. I’m anxious to start milling timber to start using for random projects around the farm!
0 Comments