We’ve learned a lot in the last 3 years of growing garlic. What started last year as a bit of a disappointment with the curing process ended up with my Jumble Garlic planting and a really successful harvest for 2025.


I think the one thing though that we didn’t expect is how much interest we were seeing from folks for not only seed garlic to plant their own and culinary garlic to cook with – but also the garlic scapes that grow from the hard neck varieties. Because of this we decided to start scaling up the garlic growing at the farm.


What I like about garlic is that its planting, while not an easy task, takes place in late fall when we don’t have a lot else going on at the farm. For our growing region, that’s usually in late October – specifically this year we planted the weekend of October 26th right before Halloween. While the planting is a lot of work we’ve learned a couple of methods that have really helped speed up the process.
The first is ground preparation, which should ideally start as soon you’re able to. If you’re planting in the same spot each year, you’ll have to wait until you harvest the previous year’s garlic, but if you’re not, I would recommend starting this as soon as you can. At the farm we aim to rotate our crop, including the garlic, and move the location each year. This meant mowing down the tall grass in that area and mulching it up. After this is done we cover the area in large black tarps and let the sun do the work of killing any existing vegetation in the area. After about a month, we pull the tarps back to till the ground one time before covering the area back up until we’re looking to plant. Doing this really helps when you do the final tilling to get the ground soft and easy to work with.


Once the ground is ready we use what we call a dibble board to make the holes for each garlic clove. I had heard of these a couple of years ago and made our first for last year’s planting. We wanted to provide a little more spacing for the cloves this time around so made an even bigger dibble board for 2025…


It’s hard to see in the pictures but the dibble board really worked well. It was key to use it when the soil was well tilled, loose, with slight moisture. If the soil is not properly prepared the dibble board will be real pain to use and likely not worth your time. The other change we made this year was to plant with the garlic in rows about 2 feet wide with a 2 foot spacing between the rows. I think having narrower rows will really help us with harvesting scapes and also being able to get into the rows for weeding.
Once the garlic is planted we cover the holes with loose soil and then cover the rows with hay. The hay has a very important job. Putting down hay helps prevent soil erosion, insulates the cloves, suppresses weeds, keeps moisture locked in, and even helps with keeping interested animals from digging up the cloves to snack on. We usually put down a layer of hay right after planting and then another right before the first snow.
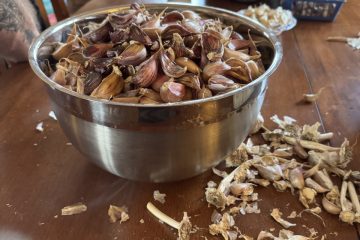
After that – we just wait until we start seeing the little green garlic sprouts peaking through the hay in the spring. At this point, we push back most of the hay, leaving room for the sprouts to emerge, while still keeping a small hay layer to continue its benefits mentioned above. As the garlic grows, we add more hay between the stems to help keep the weeds down. From the hardneck varieties, we begin harvesting the scapes once they start to curve or loop. This is typically starts in July. It is important to snip off these scapes to maximize bulb size (if the scapes continue to grow, they can zap energy from the bulb, creating a smaller bulb size). In August, the garlic bulbs are finally ready to pull up and cure. As with everything at the farm we’re continuing to learn and improve our methods each year. I’m excited to see how the small changes we made with clove spacing and row placement make a difference in 2026 – and I’m even more excited to continue to scale out this year’s planting even more.
0 Comments