Well – my last post was more than a year ago where I talked about grafting apple trees. So it seems to make sense to pick things up with that same topic. I had spent some time at the end of last year looking at options for ordering rootstock and scion wood to do my own grafting this year. I found a company in WI about 4 hours from the farm that sold root stock and scions called Maple Valley Orchards. What I liked about Maple Valley is that they seemed to specialize in heirloom varieties of apples. Varieties you likely haven’t heard of before or ones that you typically wouldn’t find at grocery store. One of our visions for the farm is to eventually make cider so I thought it would be find to try out some of these older varieties. Maple Valley did not disappoint – the individual I spoke to on the phone and in email (I believe the owner) was super helpful and very flexible. This came in handy for me as this was my first time doing this and yes – I did make some miscalculations (more on that later).
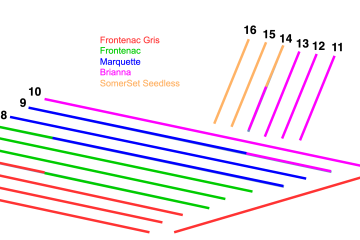
So once I had selected the scions I wanted. I spent a lot of time looking at different rootstocks with my main aim being to grow trees that would be smaller but also free standing. When you try to research this you’ll find lots of conflicting opinions. Someone on a forum will tell you that you need to use G890 and another person will tell you they did that and the tree never ended up being free standing and always had to be staked. Then I found a presentation (I wish I saved the link) from a university somewhere out east where the presenter basically said the rootstock had very little to do with it – rather it was all in how you pruned the tree. This made sense to me so I settled on 3 different rootstocks that all had the potential to be free standing semi-dwarf trees. They were Geneve 890 (G890), Malling 7 (M7), and Malling 111 (M111). Maple Valley had a chart that showed the approximate size of each tree…

So the rootstocks I picked are on the bigger side for sure but from my research the smaller dwarfing varieties seemed to indicate that they would never be able to be free standing. Cummins Nursery also had interesting descriptions of M7, M111, and G890. In any case – this is all a bit of an experiment to see what root stock does the best in our soil which is why I wanted to try a variety.
Having nailed down the rootstocks I wished to use I now had to figure out how many scions to get. I knew I wanted to order 15 of each rootstock so I ended up settling on 18 different scions. This is where I made my mistake. I initially assumed that I needed 1 scion for every rootstock. Quickly after placing my order I started reading more about grafting and realized its very common to be able to get 3-4 pieces of scion wood out of each piece of scion as they are typically 12 inches or longer when purchased. As you really only need to graft 2-3 buds onto each rootstock you can get a few trees out of each piece of scion wood. Luckily I was able to call Maple Valley and they were able to update my order to only one of each of the 18 varities of scion wood I had selected.
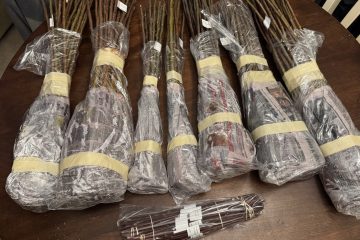
I ended up being in the area for other reasons in late February so I coordinated a local pickup with the folks at Maple valley. In early March I found time to actually do the grafts. Now this is where timing plays sort of an interesting role. I had take a grafting class the previous year at Albrecht’s nursery and learned that timing is rather important here. You are working with dormant scion wood and you want to give the grafts enough time to heal before the buds try and burst open. So if you graft in say February, you need to find a way to keep the wood dormant and in storage for a longer time than if you were doing it in April. I believe that if you order scion wood and rootstock from Maple Valley they typically ship it you on a schedule that aligns with when you should be doing the graft. For instance, we’re in zone 4b so they would ship to us in mid April. If I would have gotten the supplies then I would have grafted them almost immediately and then tried to keep the in a dark cooler place for a couple of weeks to let the graft heel. That said – I had the materials in position in late February and I was worried about the rootstock and the scions drying out (or me not storing them correctly) so I did my grafting in early March.
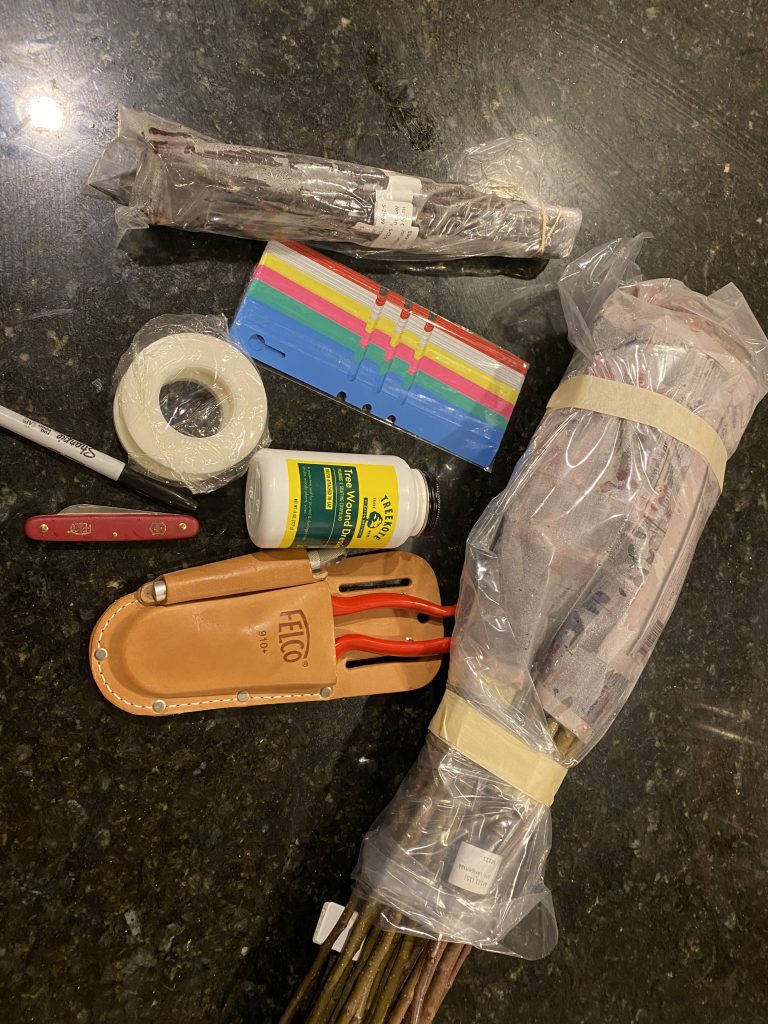
To do the grafts I needed a few supplies. I got a grafting knife, clippers, grafting tape, grafting seal, and tags to label each tree after it was grafted…
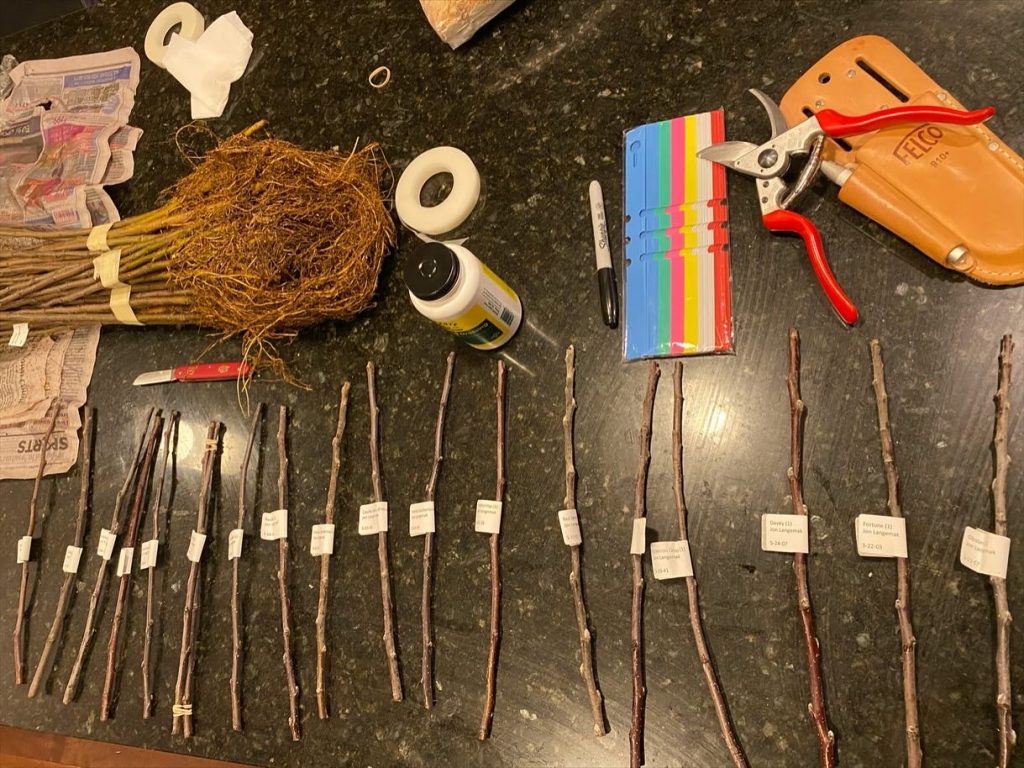
Once I had all the materials I laid out the scions and started going through them one at a time and grafting all of one kind of rootstock. So I would go through all of the G890 and select different varieties to graft onto each one. Since I had 18 scions and 15 of each rootstock things weren’t going to end up even but I wanted to make sure that I did my best to spread things out…
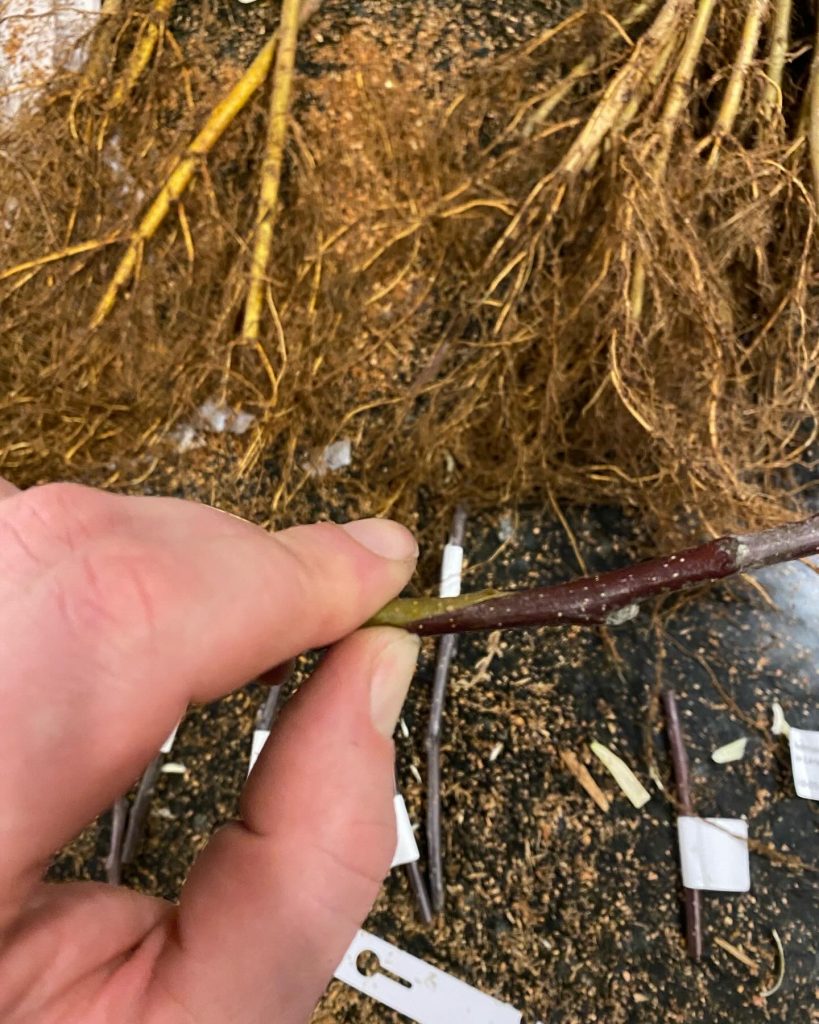
The process I had used in the grafting class I took was whip and tongue grafting – but I found I was rather clumsy at it. Specifically – it was hard to get the tongue to line up on both the rootstock and scion so that you could get a good fit. I had watched a lot of videos of grafting and found several at commercial orchards where they simply did whip cuts on each side with no tongue. To my thinking – so long as the tape was done properly there was no reason to do the tongue and in my experience it gave a better cambium to cambium connection between the two pieces of wood which is really the sole goal of grafting. To that end, my rootstocks were rather large and in some cases the scion was small enough that it was hard to get a full circle cambium to cambium connection on all sides. In cases where I couldnt do that I simple made sure that one side was fully aligned…
Next I took the tape and simply wrapped the graft union tightly from end to end. This took some practice to get it tight without tearing the tape. I had also bought grafting seal which is pretty much like tar that goes over the tape. The goal here is to make sure the union doesn’t dry out and to prevent pests etc from getting into the union. On the first couple of grafts I tried to apply the seal right after I did the tape but the seal is quite messy so I decided to wait to do that until the end when all of the grafts would be standing up on their own in a pot.
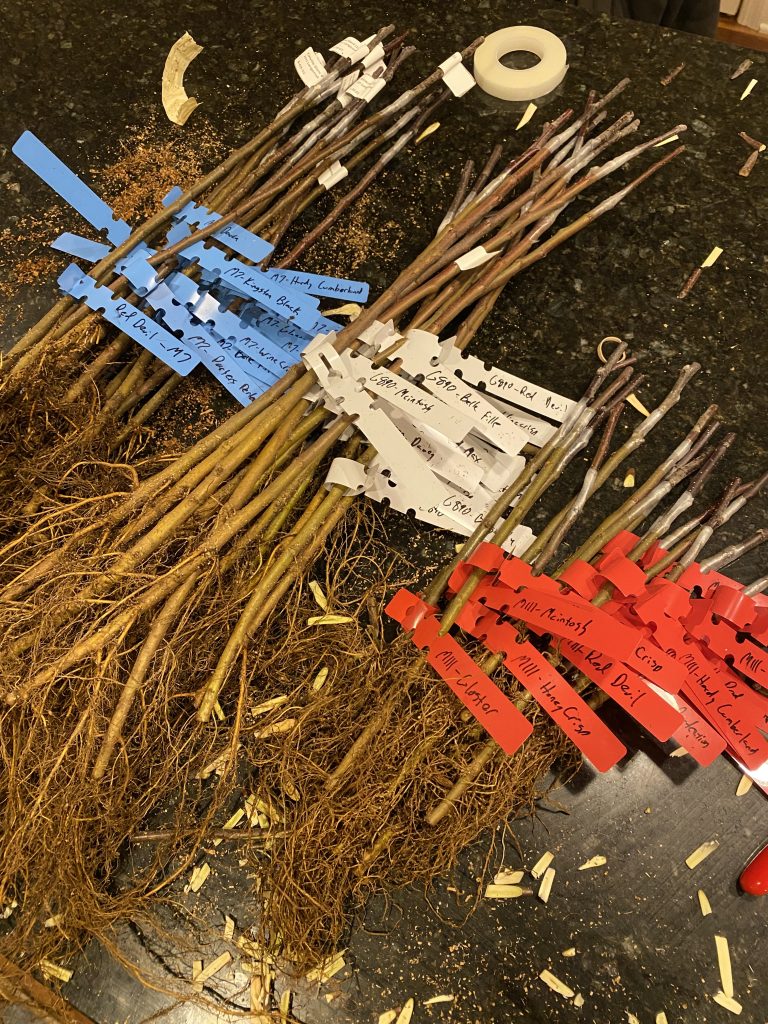
Grafting 45 trees took me about 2 hours. Toward the end I really got in a rhythm but trying to keep track of the scion and the labeling also just took a lot of time. Once they were all grafted I found 3 larger planter pots and put each rootstock variety in one having the grafts circle the edge of the pots standing upright. Then I filled each with potting soil and made sure it was moist but not soaking wet. This is what I believe is referred to as “heeling” the plants over. Basically – its a method to keep the roots hydrated before you do a final planting in either their final location or in smaller tree nursery. I’ll share some picture of what they looked like in the pots in the next post. Stay tuned!
1 Comment
Apple Tree Grafts Progress – Birch Bend Farm · May 20, 2024 at 3:18 pm
[…] some of these things as the post date will not align with when I actually did these things. In our last post I talked about the actual grafting process. I had ordered the scions and rootstock from Maple […]