I love working with wood and I have for many years dreamed of getting a lumber mill. However when I had thought about milling lumber it had always been with a mindset toward milling oak or maple for carpentry projects. Then earlier this year when looking for some lumber for a small project at the farm Laura found a local sawyer in northern WI who was selling dimensional lumber. 2x4s, 4x4s, 1 inch thick decking boards, and everything else you could imagine. We thought it would be neat to buy lumber from someone local rather than from a big box store so we gave it a try. We reached out and ended up going this past summer to buy some lumber from him. I loved going and talking to him and seeing his mill and all of the lumber he was making. It really got me thinking about the pure utility of having a mill and how we could make a lot of the lumber we needed for some of the larger building projects we want to undertake in the coming years. That coupled with the fact that we have a lot of fallen trees in the woods that are likely still viable made the decision even easier.
So I started looking for a used lumber mill. The used market was pretty dry – I get the sense a lumber mill is one of those things most people buy and keep but I kept looking around hoping something would pop up. Then black Friday came and Woodland Mills was offering free shipping and free power head for adjusting the blade height with the purchase of a mill so I jumped on the deal and ordered a HM136MAX mill. Earlier this year we purchased a wood chipper from Woodland mills for the tractor and we have been really happy with it so I felt pretty confident buying a mill from them. I ended up ordering the cover for the mill (since it will likely spend the first part of it’s life exposed to the elements) as well as one set of track extensions to extend the cutting length of the mill to just shy of 17 feet. I placed the order and then spent the next couple of days anxiously checking my inbox for a shipping notification.
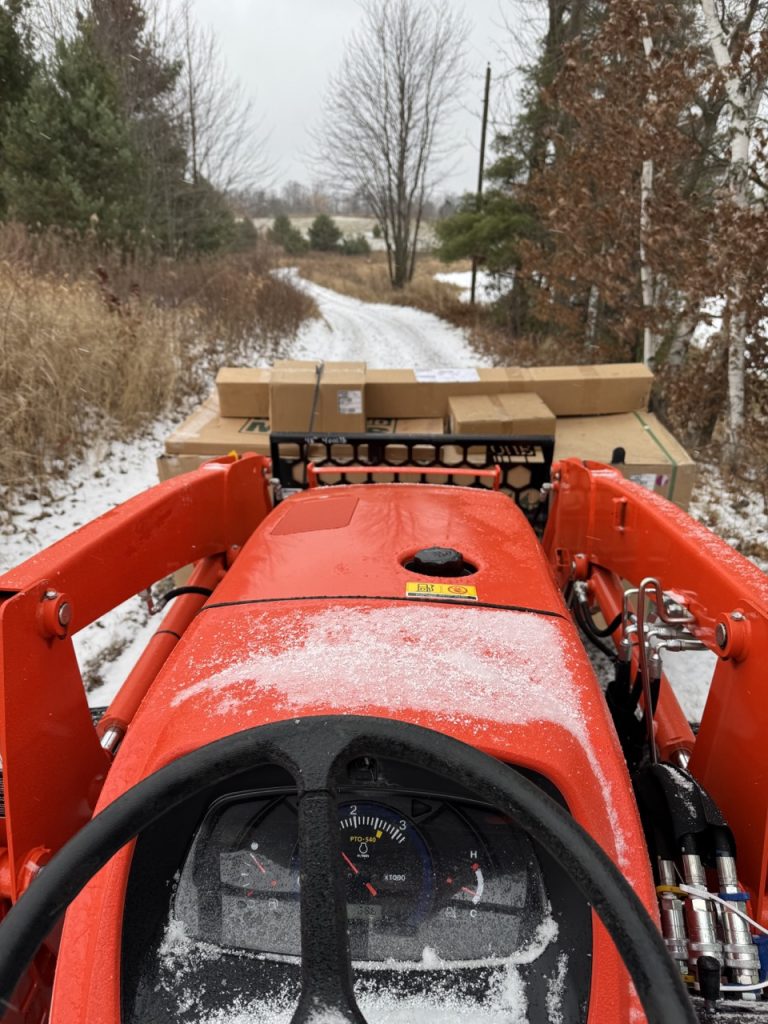
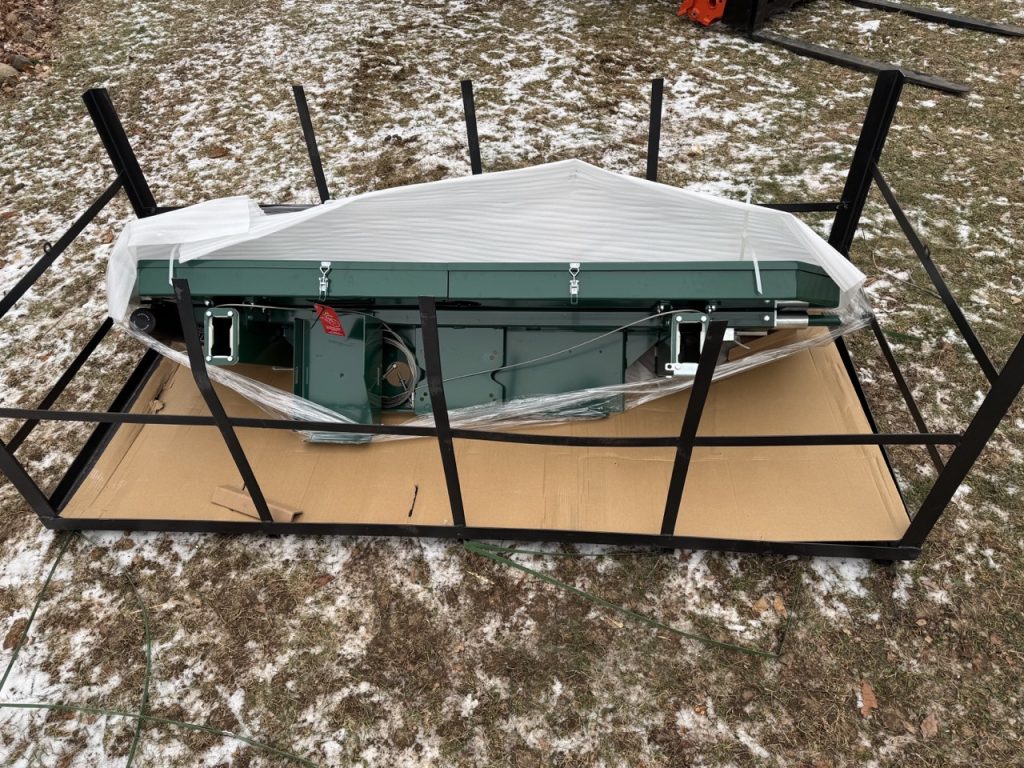
When we ordered the wood chipper it showed up about 6 days after we ordered it. I recall because I was surprised at how fast it came despite it being freight shipping. The lumber mill was a little slower. We ordered on November 18th and it was delivered on December 4th. The mill itself came on a large 8+ foot wide pallet. This for some reason took me by surprise – I wasn’t expecting an extra wide pallet like this – rather I had assumed it might come on one or two normal square pallets. While I have pallet forks for the tractor I was worried about the weight of the pallet which I believe was recorded as being around 1600 pounds. I think the front end loader can lift more than a ton but I was more worried about having enough rear ballast to keep the tractor from tipping. To add some extra rear ballast I put a box blade on the three point which weighs around 600 lbs to help balance lifting the pallet. Normally I would just pick the pallet right out of the back of the truck but because it could not fit squarely through the semi door, and because I was a touch worried about the weight of the pallet, the driver was able to get the pallet onto the lift-gate and lower it to the ground for me to pick it up. The tractor picked the pallet up but I believe I was likely at my limit for lifting without adding more ballast in the back for weight. That said, I was able to pick the pallet up drive it down the driveway and tuck it into the barn until I had a chance to start working on assembly.
That weekend I started taking the pallet apart to see what I was dealing with. I had browsed through the manual ahead of time that’s available online and knew that there was a fair amount of assembly required. The pallet itself was wrapped in in a large box which when removed revealed even more boxes…
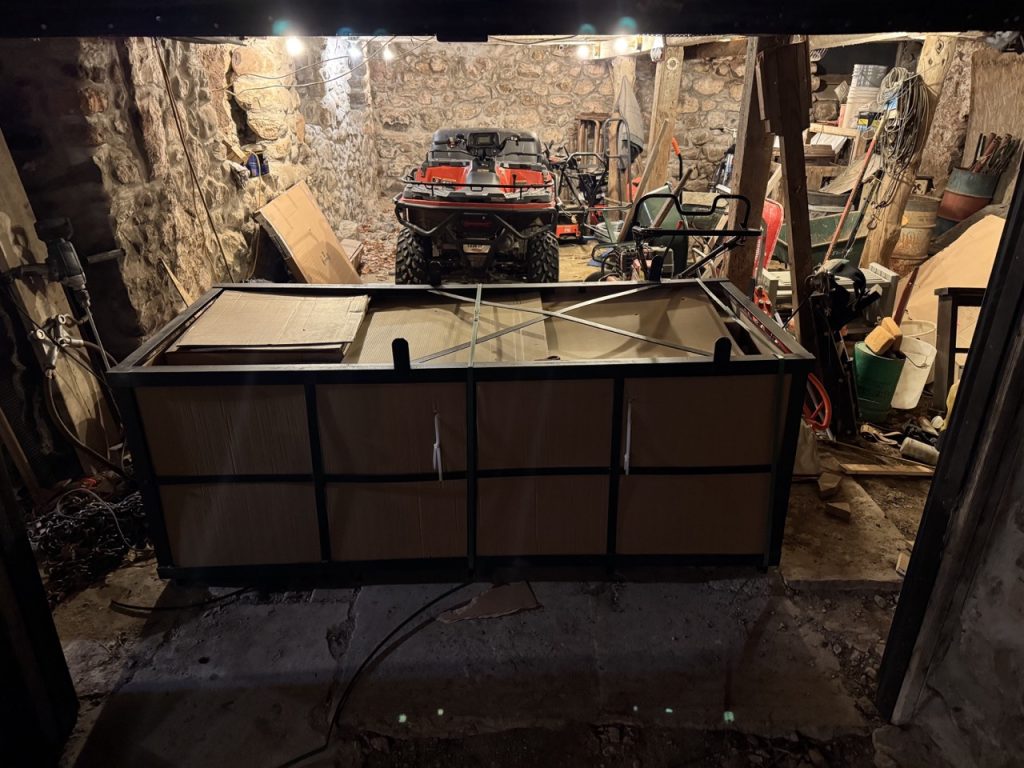
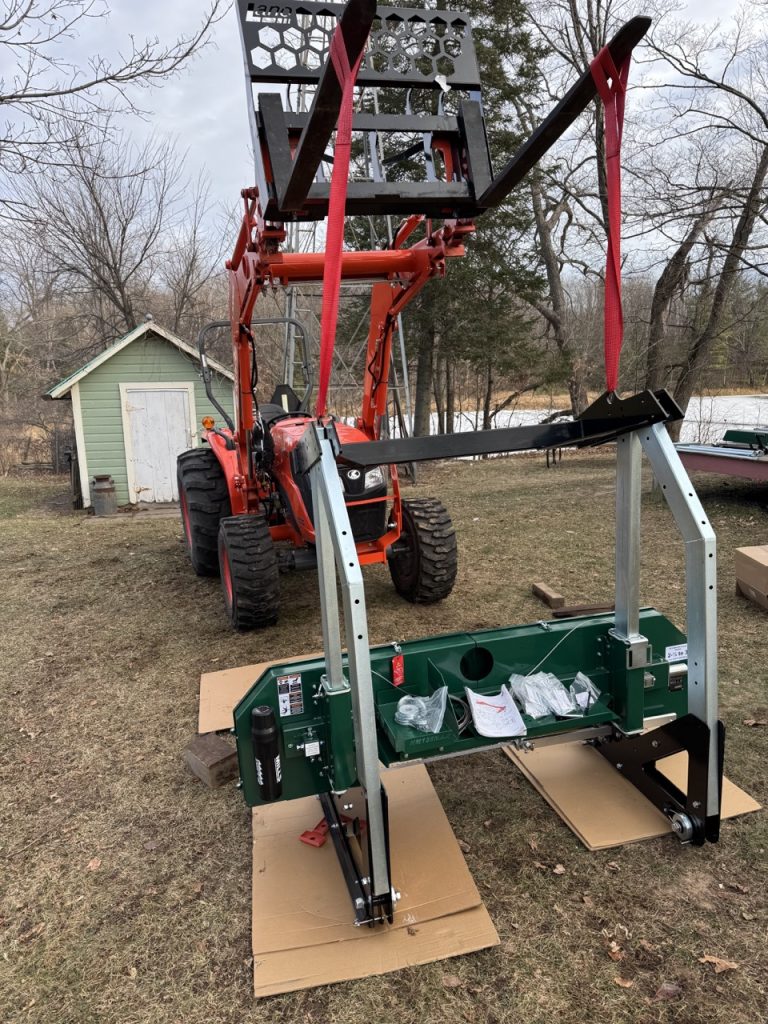
In general the packing seemed thoughtful. The motor was packaged separately (top left box in the picture) and was packed with lifting straps around it which I ended up wrapping around the forks on the tractor and lifting out that way. This was to turn into a bit of a theme in regards to assembling the mill – I believe the manual suggests that the mill assembly is a 2 person job (and I think it probably is) but I was able to get away with most of the assembly (so far) by myself with the help of the tractor.
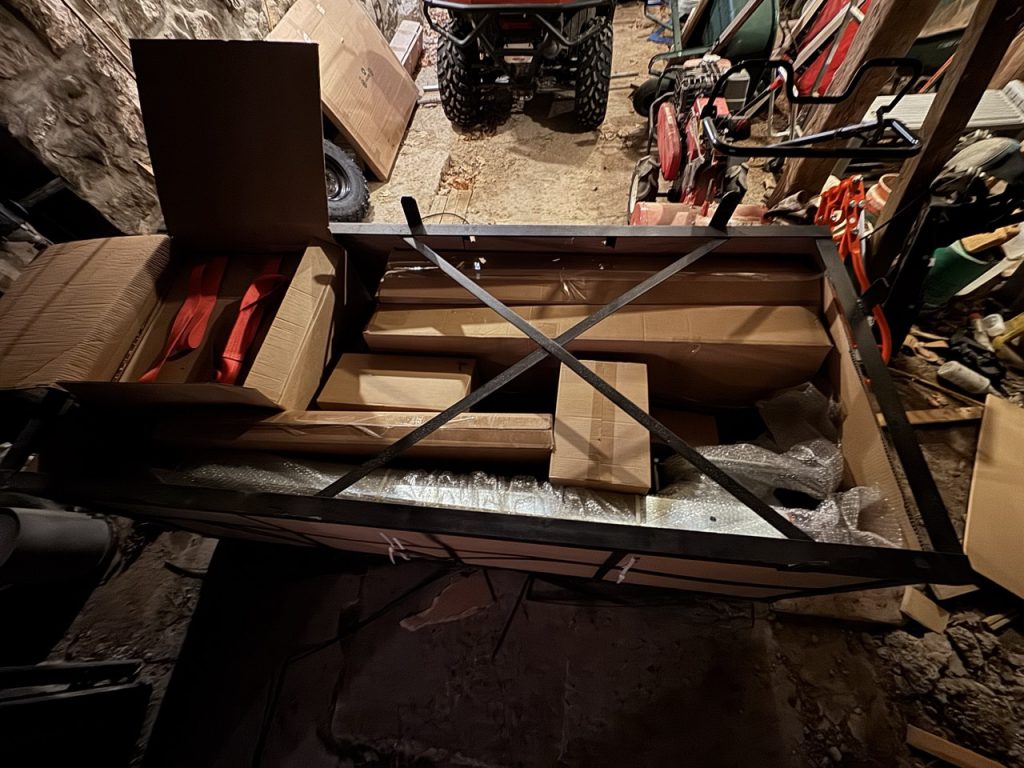
The next day I moved the pallet outside and took it apart. There were lots of components…

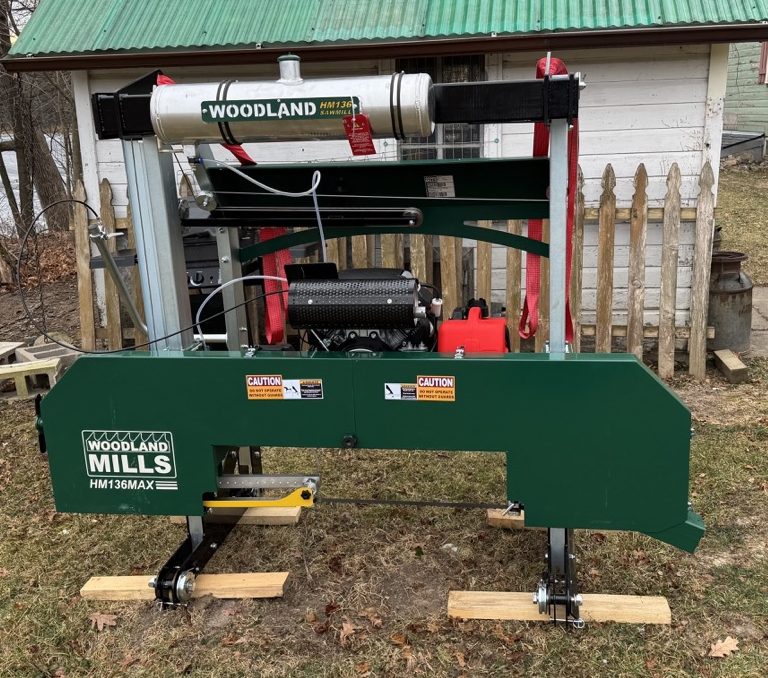
The cutting head itself was largely assembled and the last piece that was left in the pallet once I removed all of the smaller components…
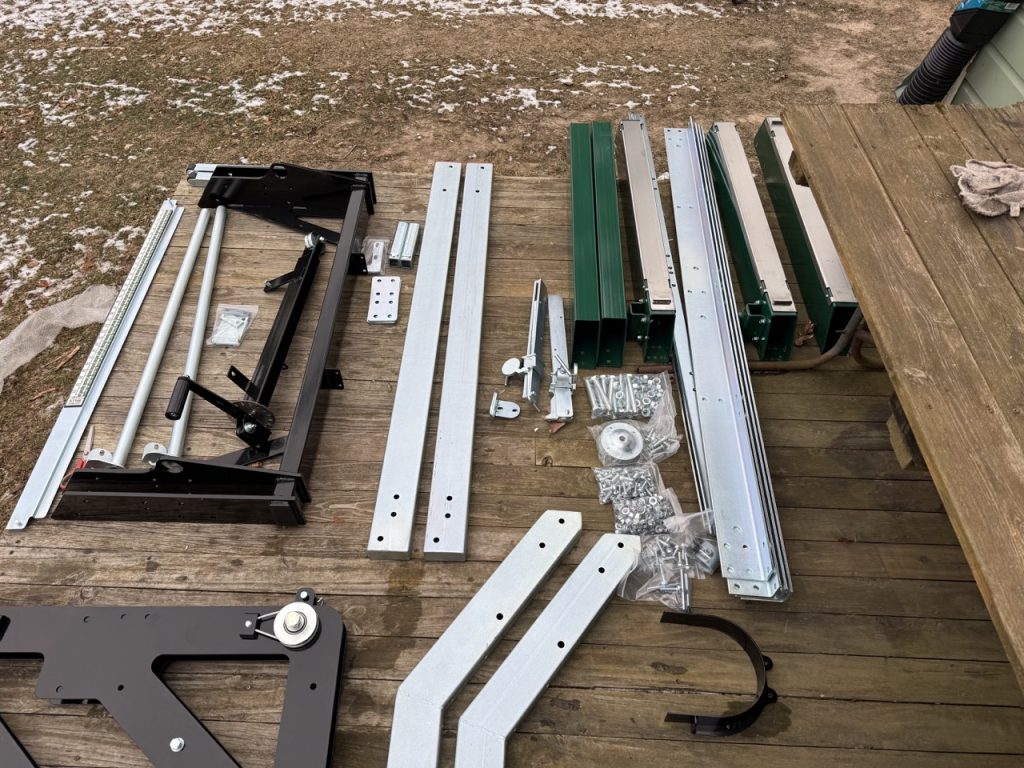
While typically you would assemble the tracks first, as the manual suggests, I decided to tackle the head assembly first. My thinking was that the mill is going to be placed a fair distance from the house and since the head assembly requires a fair amount of tools I’d get that done first and then move the head once assembled onto the tracks. So the first thing to do was to get the head out of the pallet and positioned so I could start assembly. The tractor saved the day again…

I ended up using the straps that came wrapped around the motor to lift the head and they worked great. I then laid the head down on some scrap cardboard to start the assembly. I didn’t take a lot of pictures of the assembly process but here are a few observations…
- I was impressed with the labeling the hardware bags. All of the bolts, nuts, and washers came in individual bags that were labeled with their size. While this was for sure handy I found that the hardware you needed wasn’t always where you thought it was. For instance, if a step called for two 10mm bolts and associated nuts and washer (Im making the sizes up for example) I’d spend a lot of time looking through the hardware bags for the required hardware. Then after being unable to find the hardware I’d find the part I was attaching and find that the hardware was already connected to the part being assembled for that step. Not a big deal – but I did spend about 15 minutes at one point looking for hardware that was already on the part I needed. Maybe the manual could have said “hardware already on part” or something for that given step.
- The packaging of the components was excellent. Nothing appeared damaged and a lot of the parts were grouped together in a manner that facilitated easily finding the parts for a certain step.
- The majority of the assembly steps said to not completely tighten the hardware until instructed to do so later. Then later on there was a suggestion that this hardware should only be on “finger tight”. That’s a bit if a problem as the nuts are lock nuts which means that finger tight is really rather loose. I ended up tightening them up most of the way with a ratchet and wrenches because I felt like if I didn’t the frame would have too much slop in it. I haven’t gotten to the part where I put the head on the track yet but we’ll see if this was a mistake.
- The clutch mounts on the motor with a keyed shaft. The fit was tight. I ended up having to use a rubber mallet to seat the clutch on the shaft. I wish the instructions would have indicated that it was a tight fit and might require some extra force to get it on. I always get a little nervous during assembly when you have to use extra force to get parts together.
The frame went together pretty smoothly but there were definitely some parts that would at the very least require two people. For instance – mounting the top brace to the head…
Without having the tractor there to hold the brace in place there’s no way I would have been able to get it mounted. I’d argue that even with two people you’d have a hard time holding it in place and getting the bolts in place.
All in all the head assembly took me about 5 hours of on and off work. I think if there were two people working on it you could probably get that time down to 3.5 hours. Once I had the head assembled I made sure I could pick it up with the tractor and moved it out of the way for now. Next I’ll tackle the track assembly which I’m hoping goes quicker than the head!
1 Comment
Setting up the lumber mill tracks – Birch Bend Farm · January 9, 2025 at 2:20 am
[…] I talked about in my last post we purchased a lumber mill for the farm and I talked about the delivery and building the head. I […]